

5 Things You'll want to know before your next art fair
Posted by shakia harris on Jun 1st 2022
Prior to my first outdoor art festival, I read dozens of articles and blog posts (can you tell I'm an enneagram 8?!). I stopped reading the articles because I noticed a redundancy that was not giving me that comforting feeling that every base was covered. This is by no means a comprehensive list, but these items are extremely important and led a very successful weekend.

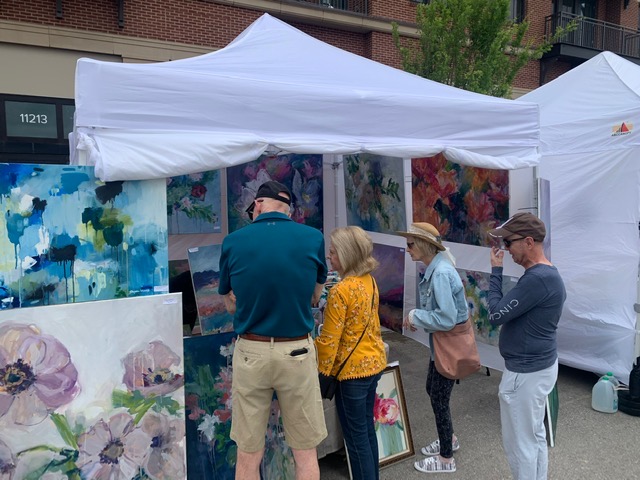
1 - SMILE and for the love of God do not greet people with your arms folded. Treat everyone the same and it will come back to you. One of the major issues we noticed is some vendors would barely interact with other vendors and unbeknownst to them they were losing a customer with their unwelcoming disposition.
Small talk is welcome among vendors, and I treated every person with kindness and respect. There were several times during the two day event (Norton Commons Art Festival), that vendors or people that I thought were "just looking" returned to buy a $40 print, or $500 original. I'm not saying to be disingenuous by any means. I'm more-so hoping to emphasize that you shouldn't turn your nose up to someone because you just never know.
At one point I sent my husband to peruse booths for me because he knows what I like. My plan was to tactfully go and purchase some things for myself before the next wave. There were SEVERAL vendors that gave him cold vibes and that resulted in my buying several pairs of earrings from the delightful lady next to me.
Just because you’re a vendor and not looking to spend doesn’t mean that’s the case for everyone else.
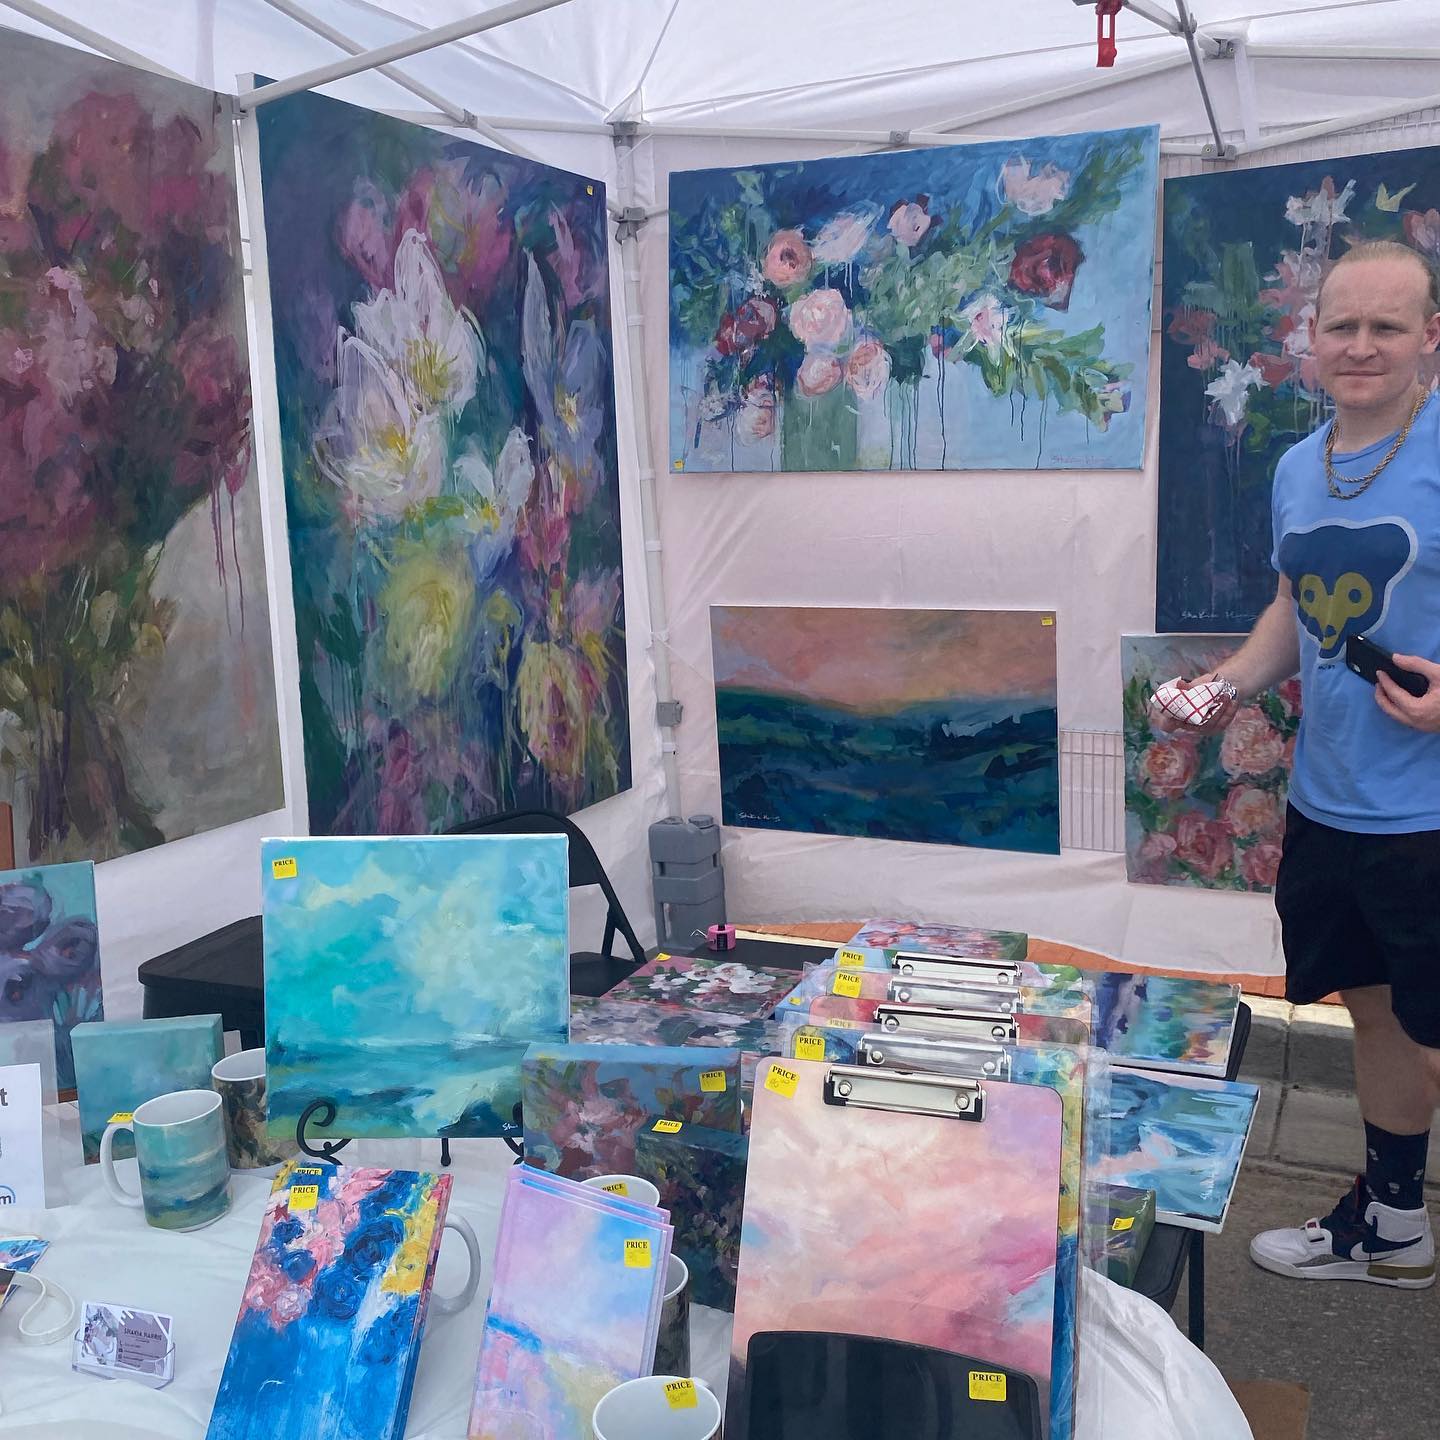
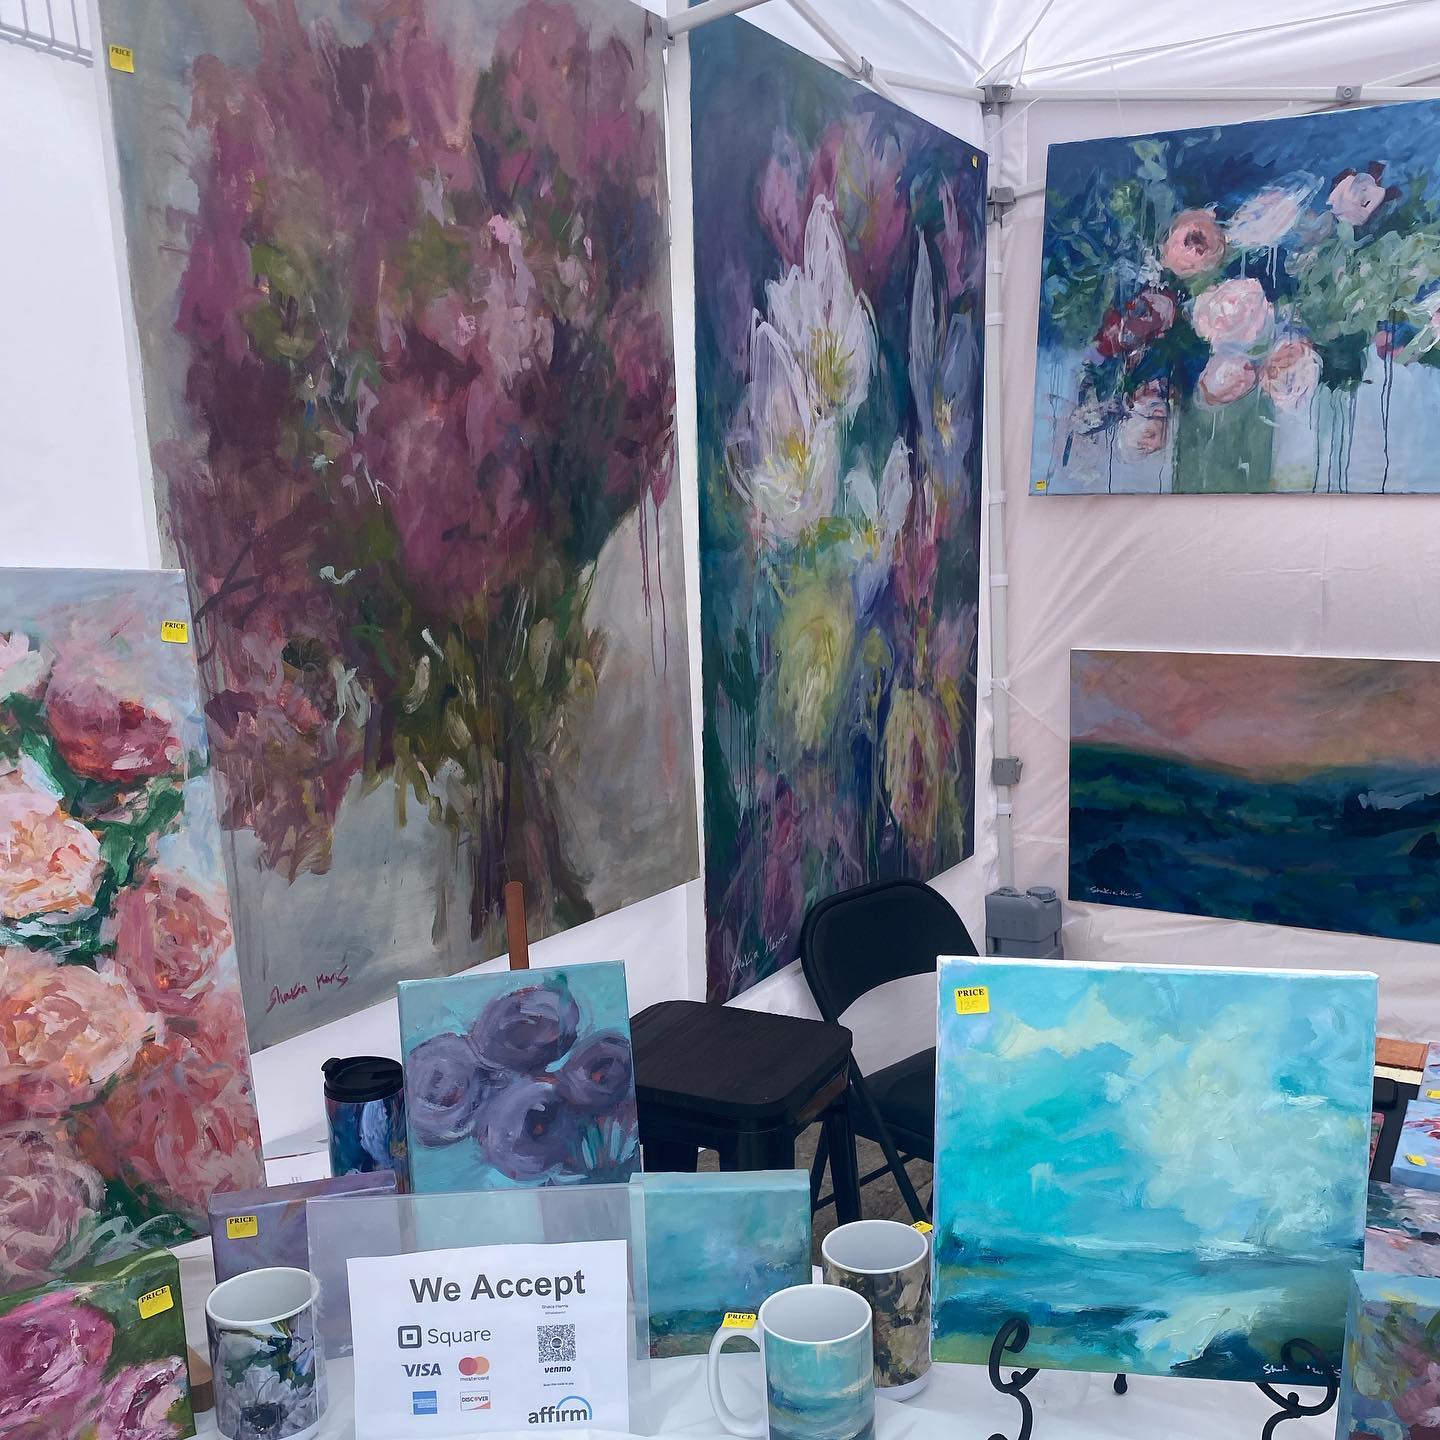
2 . Save hundreds maybe even thousands by displaying your artwork using heavy duty zip ties and wire shelving.
We didn’t have to worry about knocking anything over or blowing away. This stressed me out the most. I knew that there was no way I was going to invest in mesh walls. While the panels sold by Flourish appeared to be professional they also costs anywhere from $700 to $1700 depending on the number of panels and additional walls. Respectfully, ain't nobody got time for that.
Norton Commons is considered a fairly affluent neighborhood, so I was extremely concerned about selling a high dollar product without appearing too "arts & craftsy". Thankfully I'm married to a mechanical engineer. I handed him one wire shelf, a stack of paintings, a binder clip, some hopes & dreams. I
went into the house to paint and when I came out he took nothing and turned it into something. Before the actual show we did a dry run of how we wanted to organize paintings and get a feel for time to setup and additional supplies we'd need. I wanted to avoid scrambling as much as possible. We still scrambled but for other items.
The tent I used was 10ft by 10 ft so we (and by we I mean Mitch) had 8 ft long shelves and the width varied from 12-16 inches. I preferred the 16 but when I was purchasing these for an indoor event I had to make due with what was available at Lowes. The 8ft x 16in. and 8ft x12in shelves ranged from $22-$28, and the 6ft x12in shelves were about $20 at Lowes. We ended up using two shelves per side (3 sides total, with the front entrance open), and Mitch had the amazing idea to hang a 6 ft shelf vertically on the entrance posts of the canopy. This gave extra square footage, and worked great to get people's attention. Here I placed some of my more captivating florals & landscapes.
All together the zip ties + the shelving cost me about $175-$200. You can save money by buying the 12 ft shelves and having them cut down.
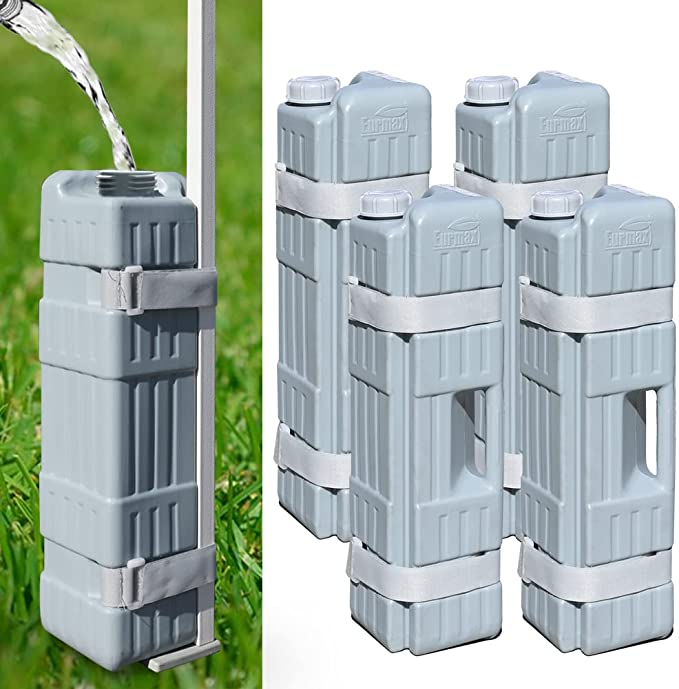
3. Fill tent weights with cement instead of water or sand. We were able to get each weight to roughly 50lbs. Whereas when they were just filled with water they barely got to 30 pounds
I chose to go with this Euramax set. The had a higher capacity then others and I just knew this was a place I did not want to skimp. I also didn't want to deal with sand or water. Our house is messy enough. I'm so glad we went with cement because we encountered devastating wind Saturday. It looked like a tornado had hit. We watched mercifully as the wind obliterated at least a dozen tents. All of which were reinforced with water jugs, boulders, and more.
 .
. 
4. Put pricing on items as soon as possible. We had so many early birds and I found it to be more helpful to have some product with all prices rather than waiting until everything was perfectly placed and then do pricing. The first day I only had prices. The second day I replaced labels to include price, size, medium, and title. It helped to serve as a means to answer questions for patrons while I was talking to someone else or if someone just didn't want to talk much.
5. Use a stool or elevated chair if you must sit, but need to talk to visitors. You’ll have to sit eventually, but I found using a bar stool to be more appropriate for speaking to patrons. It felt more professional and allowed me to have more meaningful conversations as I was able to easily maintain eye contact. I wanted to get one of those high back directors chairs for back support, but my Festival prep budget was unforgiving lol.
What do you think of these tips? Was there anything I missed?